Whether you are a hunter or not, you have probably seen deer skulls.
Some people choose to keep them as souvenirs, while others use them as part of their decor.
Deer skulls can often be very dark in color, caused by the accumulation of dirt and other debris over time.
This debris can also block sunlight from reaching the deer’s skin, which can lead to a buildup of melanin and make the skull appear darker.
Whitening a deer skull is a popular and often requested service.
The goal of this process is to remove any blemishes or discolorations that may have accumulated over time.
The white skulls are always a work that attracts those who love beauty or like to collect skeletons.
To satisfy their passion, many people hunt and whiten themselves at home.
Or some people also do the above but to make a profit.
Although their goals are different, they still desire to create the most beautiful and bright white skull.
It’s important to use the right method for the skull you’re whitening because some methods are more effective than others.
So, how to whiten a deer skull? You can make your bleached deer skull at home through the instructions in this article. Let’s find out.
How To Whiten A Deer Skull?
Preparation Tools To Whiten Deer Skulls
Aside from taking a little time, the deer skull whitening process isn’t too complicated.
To make everything more convenient and smooth, you need to prepare some of the following tools:
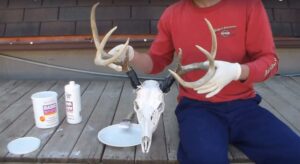
- Protective gear, including gloves and clothing
- Containers or pots that fit a deer’s head
- Large tongs and knife
- Bleach or hydrogen peroxide and water
- Fire stove
- Coating or grinding
- Screwdriver
- Bucket of skulls after cooking
- Detergents
- Read the instructions on bleaching deer skulls
How To Whiten A Deer Skull
To have a pure white skull, you must clean the outer layers of skin and hair. However, not just scraping off the outer layers, your skull will have the desired color. If you do not know how to do it or do it incorrectly, you will most likely have a slightly old milky white box.
The following instructions will help you whiten the standard skull after making the deer skull more beautiful and shiny.
Read more: what does a deer sound like
Remove the layer of skin
You can remove the skin at any time. However, this will be easier if you handle the animal while it is warm.
Use a large knife to cut the head completely separate from the body. Then you begin to cut the skin, excess tissue, and hair off the skull skeleton.
Just dislocating the lower jaw, you can easily remove the skin from the head. Once the skin is gone, proceed to remove the deer’s flesh, brain, eyes, and tongue.
In addition to the above method, you can still remove the skin by letting the tip decompose. You bury or wrap the deer head in a plastic bag and wait for the ants or maggots to eat it slowly. This natural process will take a while.
Boil the skull
Since the meat is raw, the cleaning won’t be perfect. So, you just need to clean the stub and then bring it to cook. You put your head into the pot of boiling water prepared earlier and continue to boil the water for another 4-6 hours.
Boiling is very simple, but you also need to be careful not to let the heat get too high, damaging the skull and making the bones brittle and fragile.
1st cleaning
After a few hours of cooking, the meat will be soft and easy to remove. You put the skull in a bowl of cold water and clean the fibers still attached to the bones. The action can be quick, but the force should not be too strong.
You should remove the fleshy tissue and loose teeth carefully, making sure not to lose any skeleton.
Ear bone removal
The area around the ear bone has a lot of fat. To get rid of the fat completely, you need to remove this bone. In addition, when this bone is terminated, you have a chance to get closer to the brain to clean the soft and fat-filled brain inside.
To remove the ear bone, you put a screw in the small hole in that area. Then, repeatedly pushing up and down, the bones will gradually loosen and lose connection with the skull.
Cleanse the brain
You use a hook or screwdriver, and the knife pulls out slowly. In the peeling step, you can clean the brain. After boiling the skull, you continue to remove it a second time to remove the brain from the skull completely.
Continue to boil
In the next step, you put the deer skull in the pot of water and bring it to a boil. Better add a little detergent so that the grease is better washed away. Boiling at low heat takes several hours. As the fat builds upon the surface of the water, you’ll notice that the skull looks clean. At this time, remove the skeleton and conduct a second cleaning.
2nd cleaning
You take the skull into a bowl of cold water and rinse. The purpose of this wash is to ensure that 100% of the meat, brain, and non-bone substances are completely removed. Therefore, you need to examine each corner and gently clean the whole thing meticulously.
Remove grease
Grease is always the hardest substance to wash off. So, in this step, you do not need to do anything too sophisticated, but it will be a bit time-consuming.
If you’re bleaching deer skulls in the summer, soak the head in the water and place it in the sun. In the case of winter weather, you can add an aquarium heater to speed up the process.
You may have to wait a few weeks or wait until the water tank is free of grease.
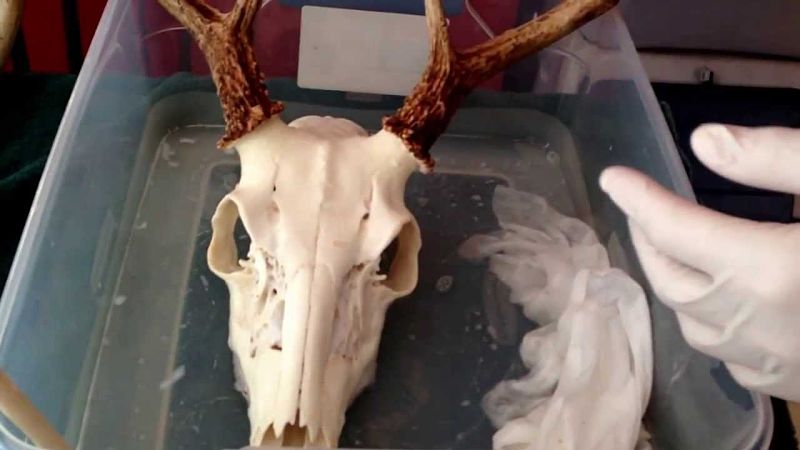
Bleaching
Once you’ve determined that the skull is free of fat, try removing it from the water and letting it dry. The ripe, dry skull is the right time for you to bleach.
Next, you mix water and bleach or hydrogen peroxide, ratio 1:1. Submerge the skull skeleton into the above mixture and wait. After a few days, the bones will whiten.
Of course, the waiting period should only be a few days and not more than a week. Because if soaked in bleach for too long, the skull will gradually rot.
Add overlays
After the skull has just finished bleaching and is now very dry, cover it with a coat of paint. The top coat helps to protect the white of the skull and contributes to its shine.
Once you’ve finished painting, you’ll have a beautiful, spotless, white deer skull.
Tips For Bleaching Deer Skulls
To ensure the safety of yourself and your skull, you should pay attention to the following things when bleaching deer skulls:
- You should perform the bleaching process in a cool and sunny place so that the steps go faster and you can easily observe and clean the meat layer.
- There’s no need to rush, skip the waiting time, or one of the steps above. Because non-standard manipulation will cause the skull not to reach the best color, and the lifetime may be reduced.
- The process involves contact with chemicals, so protection is necessary and should not be ignored.
- After completing the work, hanging it on the planting copper wire will be more beautiful and enhance the value.
- Regularly clean the skull head to keep the original white color.
Conclusion
How to whiten a deer skull? If you are a hunter and want to make more money from deer skulls, you can apply the above bleaching process. These steps are very simple and easy to follow. It also doesn’t cost you too much. Most importantly, you will have satisfying work.

