Are you looking to reupholster your boat seats? Whether you have worn out fabric or just want a new look, removing the old upholstery can be a daunting task.
How to remove boat seats? How to restore boat seats?
However, with the right tools and directions, it can be an easy process. In this blog post, we will walk you through the steps necessary to remove your boat seats for reupholstering.
With 5 minutes to read the post, Todd Vogel will answer the question “How to remove boat seats? How to restore boat seats?” and more relevant information. Let’s find out together!
How to Take Apart Boat Seats in Order to Reupholster Them
How to Take Apart Boat Seats in Order to Reupholster Them
Whether you’re reupholstering your boat seats for a fresh look or because the old upholstery is worn out, you’ll need to take the seats apart before you can start working on them. The process of taking apart boat seats isn’t difficult, but it does require a few steps. With a little time and patience, you’ll have your seats taken apart and ready to be reupholstered in no time.
Tools and Materials Needed:
-Screwdriver
-Plyers
-Fabric (for new upholstery)
Step One: Remove the screws that are holding the seat together. You’ll typically find these screws along the sides and/or back of the seat. If you can’t find them, consult your boat’s owner’s manual for help.
Step Two: Once the screws have been removed, gently pull the seat apart. If it’s stuck, try wiggling it a bit until it comes loose. Be careful not to damage the seat in the process.
Step Three: Next, remove the old upholstery from the seat frame. This can be done by simply pulling it off or, in some cases, you may need to use a screwdriver or plyers to remove stubborn staples. Either way, be careful not to damage the seat frame itself.
Step Four: Now that the old upholstery is removed, you’re ready to start working on the new upholstery. Measure and cut your fabric to size, then staple or sew it in place. Once the new upholstery is in place, reassemble the seat and screw it back together.
And that’s all there is to it! With a little time and effort, you can easily reupholster your boat seats and give them a whole new look.
Pedestal Seats
If your boat has pedestal seats, the process for taking them apart is a little different. In most cases, the seat will be mounted to the pedestal with four bolts. Simply remove these bolts and the seat will come off.
From there, you can follow steps three and four above to remove the old upholstery and put new upholstery in place. Once you’re finished, simply bolt the seat back onto the pedestal and you’re all set!
Taking care of your boat seats is an important part of owning a boat. With a little bit of time and effort, you can keep them looking great for years to come.
All Other Types of Seats
There are a few other types of boat seats that don’t fall into the categories above. These include fold-down seats, lounge seats, and bench seats.
Fold-down seats are usually mounted to the deck or floor of the boat with four bolts. To take them apart, simply remove the bolts and the seat will come off. From there, you can follow steps three and four above to remove the old upholstery and put new upholstery in place. Once you’re finished, simply bolt the seat back into place and you’re all set!
Lounge seats and bench seats are usually more permanently mounted to the boat and may not be able to be taken apart. In these cases, you’ll need to work around the seat to remove the old upholstery and put new upholstery in place. This can be a bit more challenging, but it’s still possible to do a professional-looking job.
With a little time and effort, you can easily reupholster your boat seats and give them a whole new look. No matter what type of seat you have, the process is relatively simple and just requires a few tools and materials. With new upholstery, your boat will look good as new in no time!
Instructions for Taking Out Seats in a Ranger Boat
Instructions for Taking Out Seats in a Ranger Boat
If you’re reupholstering your Ranger boat seats, you’ll need to take the seats apart before you can start working on them. The process of taking apart boat seats isn’t difficult, but it does require a few steps. With a little time and patience, you’ll have your seats taken apart and ready to be reupholstered in no time.
Tools and Materials Needed:
-Screwdriver
-Plyers
-Fabric (for new upholstery)
Step One: Remove the screws that are holding the seat together. You’ll typically find these screws along the sides and/or back of the seat. If you can’t find them, consult your boat’s manual for guidance.
Step Two: Once all of the screws have been removed, gently pull the seat apart. If it’s stuck, try wiggling it a bit until it comes loose. Be careful not to damage the seat in the process.
Step Three: Next, remove the old upholstery from the seat frame. This can be done by simply pulling it off or, in some cases, you may need to use a screwdriver or plyers to remove stubborn staples. Either way, be careful not to damage the seat frame itself.
Step Four: Now that the old upholstery is removed, you’re ready to start working on the new upholstery. Measure and cut your fabric to size, then attach it to the seat frame using staples, glue, or another method. Be sure to pull the fabric tight so there are no wrinkles or saggy areas.
Step Five: Once the new upholstery is in place, reassemble the seat and screw it back together. That’s all there is to it! With a little time and effort, you can easily reupholster your boat seats and give them a whole new look.
Taking care of your boat seats is an important part of owning a boat. With a little bit of time and effort, you can keep them looking great for years to come. By reupholstering your seats on a regular basis, you’ll be able to keep your boat looking its best and enjoy it for years to come.
Find the necessary components to reupholster your boat seats.
In order to reupholster your boat seats, you’ll need a few things:
-fabric for the new upholstery
-screws
-a screwdriver
-pliers
You can find all of these items at your local hardware store or home improvement center. Be sure to get fabric that is durable and made for outdoor use, as it will need to withstand the elements when you’re out on the water. Also, be sure to get enough fabric to cover all of the seat surfaces you’ll be reupholstering.
Once you have all of your materials, follow the steps below to reupholster your boat seats.
Take Away All of the Hardware
The first step is to take away all of the hardware that’s holding the old upholstery in place. This includes screws, nails, and anything else that’s keeping the fabric attached to the seat. Be sure to keep track of all of the hardware so you can put it back in place later.
Getting Rid of the Seats
After you’ve removed all of the hardware, you can start taking the seats out. Gently pull on the fabric until it comes loose from the seat. If it’s particularly stubborn, you may need to use a screwdriver or pliers to remove some of the staples. Once the seats are out, set them aside so you can work on them later.
How to Bring Old Vinyl Boat Seats Back to Life
How to Bring Old Vinyl Boat Seats Back to Life
Things that you will require:
-Vinegar
-Water
-Sponge
-Soft Cloth
-Mild Soap.
Cleaning and Freshening Up the Paint on Your Boat
It’s important to keep your boat looking its best, and that includes the paint job. Over time, the paint can start to fade and look dull. In addition, it can become covered in dirt, grime, and other debris. Luckily, there are a few things you can do to clean and freshen up the paint on your boat.
One way to clean the paint on your boat is to use vinegar and water. Mix equal parts vinegar and water in a bucket and then use a sponge or soft cloth to scrub the area. Be sure to rinse well with clean water afterwards. You can also add a mild soap to the mixture if you need a little extra cleaning power.
Another way to clean your boat’s paint is to use a pressure washer. This is a more powerful way to clean the paint, but it’s important to be careful not to damage the surface. Start with the pressure washer on a low setting and work your way up if necessary. Be sure to hold the wand at least six inches away from the surface of the boat.
Once you’ve cleaned the paint on your boat, you can apply a fresh coat if necessary. Be sure to follow the manufacturer’s instructions carefully and only apply paint when the temperatures are ideal for painting. With a little bit of care, you can keep your boat looking its best for years to come.
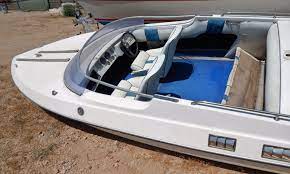
Changing out the Vinyl Fabric on Your Boat Seats
Over time, the vinyl fabric on your boat seats can become worn, faded, and damaged. When this happens, it’s time to change out the fabric so your seats look their best.
To change out the vinyl fabric on your boat seats, you’ll need a few things:
-new vinyl fabric
-scissors
-a utility knife
-tape measure
-upholstery adhesive
-a foam brush
First, use the tape measure to determine how much new vinyl fabric you’ll need. Then, use the scissors or utility knife to cut the fabric to size. Next, apply the upholstery adhesive to the back of the new vinyl fabric using the foam brush. Be sure to follow the manufacturer’s instructions carefully.
Finally, apply the new vinyl fabric to the seat, being careful to smooth out any wrinkles or bubbles. Once the adhesive has dried, you’ll have new, fresh-looking boat seats that are ready for years of use.
The Process of Taking Away Sea-Doo Boat Seats
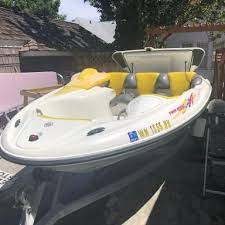
The Process of Taking Away Sea-Doo Boat Seats
Sea-Doo boats are known for their comfort and style, but over time the seats can become worn and damaged. When this happens, it’s time to remove the old seats and install new ones.
The first step is to take away all of the hardware that’s holding the old upholstery in place. This includes screws, nails, and anything else that’s keeping the fabric attached to the seat. Be sure to keep track of all of the hardware so you can put it back in place later.
After you’ve removed all of the hardware, you can start taking the seats out. Gently pull on the fabric until it comes loose from the seat. If it’s particularly stubborn, you may need to use a screwdriver or pliers to remove some of the staples. Once the seats are out, set them aside so you can work on them later.
Now it’s time to clean the seat base. Be sure to get rid of all of the dirt, grime, and debris that’s accumulated over time. Once the base is clean, you can start installing the new upholstery.
To do this, simply place the new fabric over the seat and use the old hardware to attach it in place. Start with the screws and then add any nails or other fasteners as needed. Be sure to pull the fabric tight so there are no wrinkles or bubbles. Once everything is in place, you’ll have new, fresh-looking boat seats that are ready for years of use.
The Step-by-Step Guide to Re-Upholstering Boat Cushions
The Step-by-Step Guide to Re-Upholstering Boat Cushions
Boat cushions can take a beating over time, but with a little bit of work they can look like new again. Re-upholstering boat cushions is a relatively simple process that anyone can do with a little bit of time and effort.
Items you will need:
-new fabric
-scissors
-a utility knife
-tape measure
-upholstery adhesive
-a foam brush
First, use the tape measure to determine how much new fabric you’ll need. Then, use the scissors or utility knife to cut the fabric to size. Next, apply the upholstery adhesive to the back of the new fabric using the foam brush. Be sure to follow the manufacturer’s instructions carefully.
Finally, apply the new fabric to the cushion, being careful to smooth out any wrinkles or bubbles. Once the adhesive has dried, you’ll have a new, fresh-looking boat cushion that’s ready for years of use.
step-by-step instructions
1. Use the tape measure to determine how much new fabric you’ll need.
2. Use the scissors or utility knife to cut the fabric to size.
3. Apply the upholstery adhesive to the back of the new fabric using the foam brush. Be sure to follow the manufacturer’s instructions carefully.
4. Apply the new fabric to the cushion, being careful to smooth out any wrinkles or bubbles. Once the adhesive has dried, you’ll have a new, fresh-looking boat cushion that’s ready for years of use.
5. Enjoy your newly upholstered boat cushions!
What You Need to Know About Replacing the Carpet on a Tracker Boat
What You Need to Know About Replacing the Carpet on a Tracker Boat
Tracker boats are known for their durability and longevity, but eventually the carpet will need to be replaced. Replacing the carpet on a Tracker boat is a relatively simple process that anyone can do with a little bit of time and effort.
Items you will need
-new carpet
-a utility knife
-tape measure
-upholstery adhesive
-a foam brush
step-by-step instructions
1. Use the tape measure to determine how much new carpet you’ll need.
2. Use the utility knife to cut the carpet to size.
3. Apply the upholstery adhesive to the back of the new carpet using the foam brush. Be sure to follow the manufacturer’s instructions carefully.
4. Apply the new carpet to the boat, being careful to smooth out any wrinkles or bubbles. Once the adhesive has dried, you’ll have a new, fresh-looking boat that’s ready for years of use.
5. Enjoy your newly upholstered Tracker boat!
How to Take Off the Visor of a Helmet
How to Take Off the Visor of a Helmet
The visor on a helmet is designed to protect your eyes from the sun, wind, and debris. Eventually, though, the visor will need to be replaced. Replacing the visor on a helmet is a relatively simple process that anyone can do with a little bit of time and effort.
Items you will need
-a screwdriver
-new visor
-tape measure
-upholstery adhesive
step-by-step instructions
1. Use the screwdriver to remove the screws that hold the old visor in place.
2. Use the tape measure to determine how much new fabric you’ll need.
3. Cut the new fabric to size using the utility knife.
4. Apply the upholstery adhesive to the back of the new fabric using the foam brush. Be sure to follow the manufacturer’s instructions carefully.
5. Apply the new fabric to the visor, being careful to smooth out any wrinkles or bubbles. Once the adhesive has dried, you’ll have a new, fresh-looking visor that’s ready for years of use.
6. Enjoy your newly upholstered helmet!
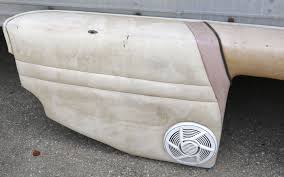
Removing the Visor from a Boat
The visor on a boat is designed to protect your eyes from the sun, wind, and debris. Eventually, though, the visor will need to be replaced. Replacing the visor on a boat is a relatively simple process that anyone can do with a little bit of time and effort.
Items you will need
-a screwdriver
-new visor
-tape measure
-upholstery adhesive
step-by-step instructions
1. Use the screwdriver to remove the screws that hold the old visor in place.
2. Use the tape measure to determine how much new fabric you’ll need.
3. Cut the new fabric to size using the utility knife.
Reinstalling the Visor on a Boat
1. Apply the upholstery adhesive to the back of the new fabric using the foam brush. Be sure to follow the manufacturer’s instructions carefully.
2. Apply the new fabric to the visor, being careful to smooth out any wrinkles or bubbles. Once the adhesive has dried, you’ll have a new, fresh-looking visor that’s ready for years of use.
3. Use the screwdriver to reattach the screws that hold the visor in place.
4. Enjoy your newly upholstered boat!
How to Make Changes to the Bunks on Your Boat Trailer
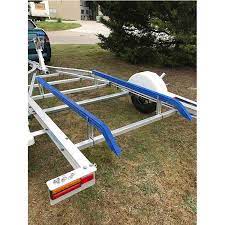
How to Make Changes to the Bunks on Your Boat Trailer
The bunks on your boat trailer are designed to support your boat and keep it from moving around while you’re driving. Eventually, though, the bunks will need to be replaced. Replacing the bunks on a boat trailer is a relatively simple process that anyone can do with a little bit of time and effort.
Items you will need
-new bunk boards
-tape measure
-saw
-drill
-screws
step-by-step instructions
1. Use the tape measure to determine how much new lumber you’ll need.
2. Cut the new lumber to size using the saw.
3. Drill pilot holes in the new lumber using the drill.
4. Attach the new lumber to the boat trailer using screws.
5. Enjoy your newly upholstered boat trailer!
F.A.Q about “How to remove boat seats”
How do you remove a boat seat from the base?
Spray it with some Liquid Wrench or WD-40 and let it soak for a good 30 min. Then take a rag and a pipe wrench, wrap the rag around the base of the post to prevent jaw marks from the pipe wrench and turn. It may take a few tries but it will come out.
Can I remove the middle bench seat from aluminum boat?
You can remove the bench in front of the rear seat and still be seaworthy. Do not remove the tiny seat at the bow if there is one, or the bench that is located up near the bow(the bench that is about 4′ back from the bow. This bench, and the rear seat provide the structural integrity of your boat.
How do you remove a pedestal seat from a bass boat?
Ziptie the release button down, then put the bottle jack on the deck. Wedge the 2×4 (cut to the right size of course) between the bottom of the seat and the top of the bottle jack. Give the handle two or three pumps. You’ll hear a loud pop, and the seat pedestal will be free.
Why is there foam in jon boat seats?
the foam adds flotation in case of the boat being flooded. if you take it out of the front you should replace it somewhere else in the boat. putting it under the floor between the ribs is a good idea, it also reduces noise from waves hitting the bottum of the hull.
How do you remove a stuck spring boat seat pedestal?
tap around the base of the pedestal with a plastic mallet,while spraying where the pedestal meets the base with penetrating oil,that should shock it loose. if not,and you can be very careful,pour some boiling water on the base,the heat should expand the base enough to allow easy removal,please dont burn yourself!
Conclusion
When removing the old upholstery, take care to not damage the frame or wood of the seat. Use a screwdriver to remove any screws in the hinges and around the edge of the seat.
Pry out staples with a flat head screwdriver, then use a knife to cut through any fabric that is still attached to the frame. Be careful not to cut into the foam padding.
With all of the old upholstery removed, sand down any rough edges on the frame or wood. Now is also a good time to repaint or seal any bare wood surfaces.
Apply new batting if needed, then attach your new fabric using staples or spray adhesive. Give your newly reupholstered seats a test drive and admire your hand
This discoverthedinosaurs.com post will show the information about “How to remove boat seats”
- how to restore boat seats
- ranger 185vs seat removal
- how to remove bowrider cushions
- hurricane boats

