Building a boat seat box is a great way to add additional seating and storage to your boat. There are many different ways to build a boat seat box, so choose the method that best fits your needs.
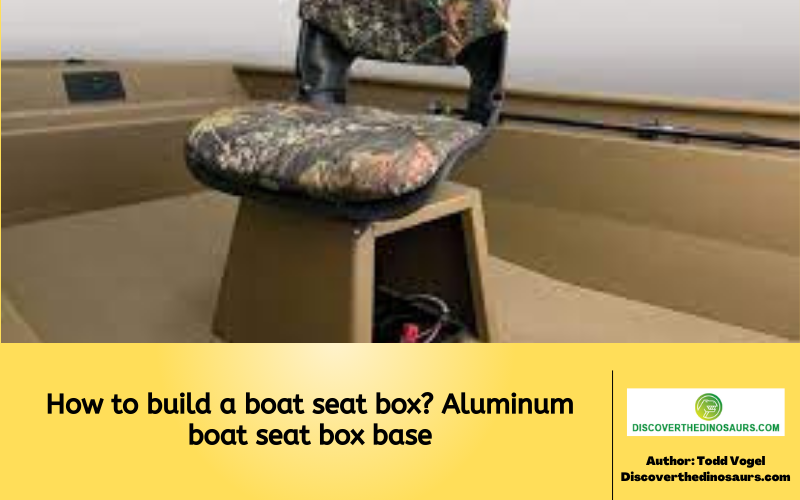
How to build a boat seat box? Aluminum boat seat box base
In this article, Todd Vogel will show you how to build a simple and sturdy boat seat box using only basic tools and materials. Let’s get started!
What Is the Best Way to Make a Boat Bench Seat?
What Is the Best Way to Make a Boat Bench Seat?
When it comes to building a boat bench seat, there are several things you need to take into account.
A poorly designed or assembled bench seat can be uncomfortable and hazardous to use, and you will also want to ensure that the seat is sturdy enough for your needs.
With this in mind, here are some tips on how to build a boat bench seat that is both safe and comfortable.
- Consider the size of your boat when designing the seating area. Many small boats only have room for one person’s body width worth of space between the sides of the boat and the bench itself, so make sure you plan carefully before purchasing any materials. In most cases, it is better to err on the side of caution when making a bench seat for a small boat – you can always make it smaller, but it is very difficult to make a bench seat larger once it has been installed.
- Make sure the bench seat is properly supported. A good rule of thumb is to have at least two supports for every three feet of bench length. For example, if your bench seat is six feet long, you should have at least four supports underneath it. These can be in the form of legs, crossbars, or both.
- Use high-quality materials when building your bench seat. This will ensure that it lasts longer and withstands the elements better. Marine-grade plywood is a good choice for the seat itself, and stainless steel hardware should always be used to attach the supports underneath.
Whether you are building a bench seat for an existing boat or installing one in a new boat, these tips can help ensure that your bench seat is both safe and comfortable to use.
By planning ahead and using high-quality materials, you can enjoy your bench seat for many years to come.
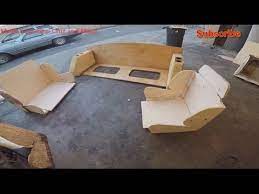
DIY Your Boat Bench Seat! (Wooden Banquette)
DIY Your Boat Bench Seat! (Wooden Banquette)
If you are interested in building your own boat bench seat, there are a few things that you will need to keep in mind. First, it is important to choose the right type of materials and hardware for your project.
You will also want to make sure that the bench seat is properly supported and that it has an appropriate size for your boat. With these considerations in mind, here are some tips on how to build a wooden banquette for your boat.
- Start by choosing high-quality wood for the seat itself. Marine-grade plywood or similar types of materials work well, as they can withstand exposure to moisture from the water and weathering from sun and wind. In addition, be sure to use stainless steel or other types of non-rusting hardware to attach the seat to the supports underneath.
- Make sure that the bench seat is properly supported. A good rule of thumb is to have at least two supports for every three feet of bench length. For example, if your bench seat is six feet long, you should have at least four supports underneath it. These can be in the form of legs, crossbars, or both.
- Install the bench seat in an area that is large enough to accommodate it. Many small boats only have room for one person’s body width worth of space between the sides of the boat and the bench itself, so make sure you plan carefully before purchasing any materials. In most cases, it is better to err on the side of caution when making a bench seat for a small boat – you can always make it smaller, but it is very difficult to make a bench seat larger once it has been installed.
Whether you are building a new boat or simply looking to replace an existing seating area, these tips can help ensure that your wooden banquette is both safe and comfortable.
By taking the time to plan ahead and using high-quality materials, you can enjoy your bench seat for many years to come.
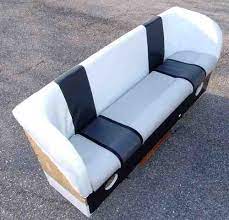
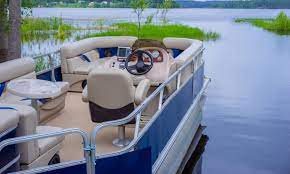
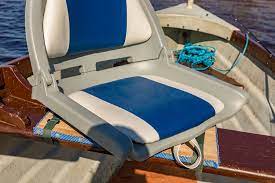
Cushioned And Vinyl-covered Boat Bench Seats
Cushioned And Vinyl-covered Boat Bench Seats
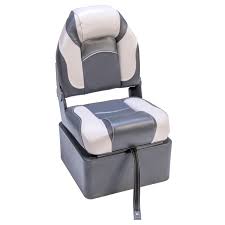
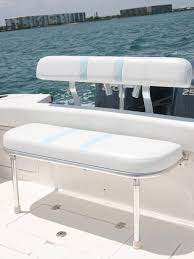
If you are looking for a more luxurious and comfortable seating option for your boat, cushioned and vinyl-covered bench seats may be the perfect choice.
These types of seats can provide superior comfort and style, while also adding protection from exposure to dampness and water. Here are some key tips for installing cushioned and vinyl-covered boat bench seats in your vessel.
- The first step is to choose high-quality materials that can withstand exposure to moisture from rain or water splashes as well as exposure to direct sunlight. For the seat cushion itself, it is typically best to use a material such as marine-grade foam padding covered with a durable outdoor fabric or vinyl. If needed, you can also add additional cushioning or support layers to provide additional comfort and protection.
- Once you have selected the materials for your seat cushions, it is important to make sure that they are affixed securely to the supports underneath. Typically, this involves using high-quality upholstery staples or other types of screws or fasteners that are designed specifically for use with marine applications. You may also need to add foam padding under the vinyl cover, which can help ensure a snug fit and prevent shifting over time.
- Finally, it is important to carefully plan the placement of any cushioned and vinyl-covered seats in your boat so that they do not interfere with other components such as steering controls, seating areas for passengers, or storage compartments. By taking the time to plan ahead and install these seats properly, you can enjoy many years of comfortable and stylish seating on your boat.
Additional Considerations:
In addition to following the tips above, there are a few other things to keep in mind when installing cushioned or vinyl-covered bench seats in your boat. First, be sure to use high-quality materials that are resistant to mildew, fading, and UV damage from direct sunlight.
Second, it is important to affix the seat cushions securely so that they do not shift over time or become loose due to vibration from the engine or waves.
Finally, make sure that the placement of any bench seats does not interfere with other areas of the boat such as storage compartments, steering controls, or seating areas for passengers.
With these key considerations in mind, you can enjoy many years of comfortable and stylish boat bench seats on your vessel.
Instructions on how to construct your own boat furniture
Instructions on how to construct your own boat furniture
If you’re looking to save money on your boat, or if you’re simply a craftsman at heart, then learning how to build your own boat furniture can be a great way to do so. Building your own furniture also allows you to customize it to better suit your needs and the look of your vessel. In this article we’ll run through the basics of building a simple yet sturdy boat seat box.
First things first, you’ll need to gather up some supplies. For the frame of the seat box you’ll need two lengths of 2×4 lumber, a sheet of 3/4″ plywood, some screws and nails, and some wood glue. You’ll also need something to use as legs for the seat box; four lengths of 1×2 lumber will do the trick.
Finally, you’ll need some padding and upholstery fabric to finish things off.
Once you have all of your supplies, it’s time to start building. Cut the two lengths of 2×4 into four equal pieces; these will form the corners of the seat box frame. Next, take the sheet of plywood and cut it into two pieces that are each 24″ wide and 30″ long. These will be the top and bottom panels of the seat box.
Now it’s time to start assembling the frame. Take two of the 4′ lengths of 2×4 and screw them together at their ends using three screws spaced evenly apart. Repeat this process with the other two lengths of 2×4. You should now have two L-shaped frames.
Next, take the two plywood panels and attach them to the 2×4 frames using wood glue and screws. Make sure that the screws are driven in at an angle so that they don’t come out through the other side of the plywood.
Now it’s time to add the legs to the seat box. Cut four lengths of 1×2 lumber to whatever height you desire; typically somewhere between 6″ and 8″ will work well. Attach these legs to each corner of the seat box frame using nails or screws.
Finally, it’s time to finish things off by adding padding and upholstery fabric to the seat box. Cut a piece of foam padding to fit the top panel of the seat box, and glue or staple it in place. Then, cut a piece of upholstery fabric slightly larger than the top panel and staple or glue it in place. Trim off any excess fabric.
And that’s it! You’ve now built yourself a sturdy and stylish boat seat box that will provide years of comfortable seating.
Restoring the Seats and Cushions on Your Boat: A Do-It-Yourself Guide to Upholstery
Restoring the Seats and Cushions on Your Boat: A Do-It-Yourself Guide to Upholstery
If your boat’s seats and cushions are looking a little worse for wear, then it might be time to give them a makeover. Restoring the upholstery on your boat is a relatively simple and inexpensive project that can really breathe new life into your vessel. In this article we’ll run through the basics of how to do just that.
The first thing you’ll need to do is remove the old fabric from the seat or cushion. Use a utility knife to carefully cut away the fabric, being careful not to damage the foam beneath. Once the fabric is removed, use a brush or vacuum to clean away any dirt or debris from the surface of the foam.
Next, apply a layer of adhesive spray to the back side of the foam. This will help to keep the new fabric in place.
Now it’s time to cut the new fabric. Cut the fabric slightly larger than the piece of foam, allowing for a ½” seam allowance all the way around.
To attach the new fabric to the foam, start by applying a line of glue or adhesive spray along one edge of the foam. Then, wrap the fabric around the edge of the foam and glue or staple it in place. Repeat this process for each side of the foam until it is completely covered. Trim away any excess fabric.
And that’s it! You’ve now successfully upholstered your boat seat or cushion and given it a brand new lease on life. Enjoy your newly refreshed vessel!
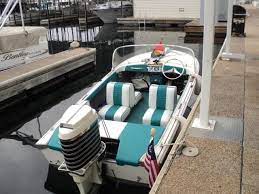
Back Seat Rebuild for the Bayliner Boat Restoration Project
Back Seat Rebuild for the Bayliner Boat Restoration Project
If you’re working on a Bayliner boat restoration project, one of the tasks you’ll likely need to tackle at some point is rebuilding the back seat. This isn’t a difficult job, but it does require a bit of time and effort. Here’s a basic overview of how to do it.
The first thing you’ll need to do is remove the old upholstery from the back seat. Use a utility knife to carefully cut away the fabric, being careful not to damage the foam beneath. Once the fabric is removed, use a brush or vacuum to clean away any dirt or debris from the surface of the foam.
Next, apply a layer of adhesive spray to the back side of the foam. This will help to keep the new fabric in place.
Now it’s time to cut the new fabric. Cut the fabric slightly larger than the piece of foam, allowing for a ½” seam allowance all the way around.
To attach the new fabric to the foam, start by applying a line of glue or adhesive spray along one edge of the foam. Then, wrap the fabric around the edge of the foam and glue or staple it in place. Repeat this process for each side of the foam until it is completely covered. Trim away any excess fabric.
And that’s it! You’ve now successfully upholstered your back seat and given it a brand new lease on life. Enjoy your newly refreshed vessel!
HOW TO REUPHOLSTER VINYL BOAT SEATS CHEAP DIY WITH NO SEWING FOR UNDER $100!! DO IT YOURSELF & SAVE!
HOW TO REUPHOLSTER VINYL BOAT SEATS CHEAP DIY WITH NO SEWING FOR UNDER $100!! DO IT YOURSELF & SAVE!
If you’re looking to save some money on your boat restoration project, then one area you can cut costs is by reupholstering the vinyl boat seats yourself. This is a relatively simple and straightforward process that anyone can do, and it doesn’t require any sewing. Here’s a basic overview of how to do it.
The first thing you’ll need to do is remove the old upholstery from the vinyl boat seat. Use a utility knife to carefully cut away the fabric, being careful not to damage the foam beneath. Once the fabric is removed, use a brush or vacuum to clean away any dirt or debris from the surface of the foam.
Next, apply a layer of adhesive spray to the back side of the foam. This will help to keep the new fabric in place.
Now it’s time to cut the new fabric. Cut the fabric slightly larger than the piece of foam, allowing for a ½” seam allowance all the way around.
To attach the new fabric to the foam, start by applying a line of glue or adhesive spray along one edge of the foam. Then, wrap the fabric around the edge of the foam and glue or staple it in place. Repeat this process for each side of the foam until it is completely covered. Trim away any excess fabric.
And that’s it! You’ve now successfully upholstered your vinyl boat seat and given it a brand new lease on life. Enjoy your newly refreshed vessel!
Homemade Boat Seats: How to Make Them Look Professional
Homemade Boat Seats: How to Make Them Look Professional
If you’re working on a budget and need to save money on your boat restoration project, then one area you can cut costs is by making your own boat seats. This is a relatively simple and straightforward process that anyone can do, and it doesn’t require any sewing. Here’s a basic overview of how to do it.
The first thing you’ll need to do is remove the old upholstery from the boat seat. Use a utility knife to carefully cut away the fabric, being careful not to damage the foam beneath. Once the fabric is removed, use a brush or vacuum to clean away any dirt or debris from the surface of the foam.
Next, apply a layer of adhesive spray to the back side of the foam. This will help to keep the new fabric in place.
Now it’s time to cut the new fabric. Cut the fabric slightly larger than the piece of foam, allowing for a ½” seam allowance all the way around.
To attach the new fabric to the foam, start by applying a line of glue or adhesive spray along one edge of the foam. Then, wrap the fabric around the edge of the foam and glue or staple it in place. Repeat this process for each side of the foam until it is completely covered. Trim away any excess fabric.
And that’s it! You’ve now successfully upholstered your boat seat and given it a brand new lease on life. Enjoy your newly refreshed vessel!
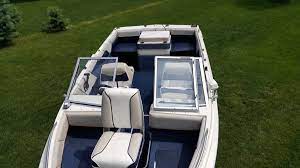
Instructions on How to Construct Seats for a Pontoon Boat
Instructions on How to Construct Seats for a Pontoon Boat
If you’re looking for a fun and unique way to personalize your pontoon boat, then why not build your own custom seats? Not only will this save you money, but it’ll also give you the opportunity to choose your own materials and design. Plus, it’s a great way to add a personal touch to your vessel.
The first step in building custom pontoon boat seats is to determine the dimensions of the seats. Once you have the measurements, cut the wood for the seat frame using a jigsaw or circular saw. If you’re using plywood, be sure to seal the edges with epoxy resin to prevent them from Splintering.
Next, drill pilot holes in the seat frame and screw the plywood or particle board to the frame. Be sure to countersink the screws so that they’re flush with the surface of the wood.
Now it’s time to upholster the seats. Begin by stapling a piece of batting to the underside of the seat frame. Then, stretch the fabric over the top of the seat and staple it in place on the other side. Trim away any excess fabric, leaving a ½” seam allowance.
Finally, attach trim around the edge of the seat using finishing nails or an upholstery adhesive. This will give your seats a professional-looking finish. And that’s it! You’ve now successfully built your own custom pontoon boat seats.
What are the steps involved in creating a CUSTOM boat seat from the ground up?
What are the steps involved in creating a CUSTOM boat seat from the ground up?
Building a custom boat seat from the ground up involves a few key steps, including:
1. Determining the dimensions of the seat.
2. Cutting the wood for the seat frame.
3. Drilling pilot holes in the frame and screwing in the plywood or particle board.
4. Upholstering the seat with fabric and batting.
5. Trimming away any excess fabric and attaching trim around the edge of the seat.
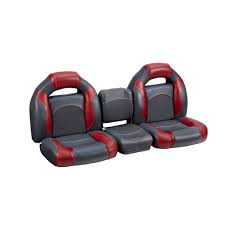
Do-It-Yourself Boat Seat Upgrades: Replace Old, Worn Seats Before the Start of the Boating Season
Do-It-Yourself Boat Seat Upgrades: Replace Old, Worn Seats Before the Start of the Boating Season
Start the boating season off right by replacing old, worn boat seats with new, custom-built ones. Not only will this save you money, but it’ll also give you the opportunity to choose your own materials and design. Plus, it’s a great way to add a personal touch to your vessel.
The first step in building custom boat seats is to determine the dimensions of the seats. Once you have the measurements, cut the wood for the seat frame using a jigsaw or circular saw. If you’re using plywood, be sure to seal the edges with epoxy resin to prevent them from Splintering.
Next, drill pilot holes in the seat frame and screw the plywood or particle board to the frame. Be sure to countersink the screws so that they’re flush with the surface of the wood.
Now it’s time to upholster the seats. Begin by stapling a piece of batting to the underside of the seat frame. Then, stretch the fabric over the top of the seat and staple it in place on the other side. Trim away any excess fabric, leaving a ½” seam allowance.
Finally, attach trim around the edge of the seat using finishing nails or an upholstery adhesive. This will give your seats a professional-looking finish. And that’s it! You’ve now successfully built your own custom boat seats.
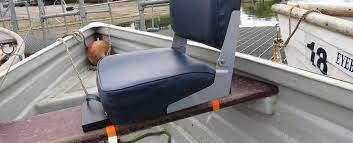
DIY FLY FISHING BOAT SEAT
DIY FLY FISHING BOAT SEAT
Building a custom fly fishing boat seat is a great way to add a personal touch to your vessel and save money. Follow these steps to create your own custom seat:
1. Determine the dimensions of the seat.
2. Cut the wood for the seat frame using a jigsaw or circular saw. If you’re using plywood, be sure to seal the edges with epoxy resin to prevent them from Splintering.
3. Drill pilot holes in the seat frame and screw the plywood or particle board to the frame. Be sure to countersink the screws so that they’re flush with the surface of the wood.
4. Upholster the seat with fabric and batting. Begin by stapling a piece of batting to the underside of the seat frame. Then, stretch the fabric over the top of the seat and staple it in place on the other side. Trim away any excess fabric, leaving a ½” seam allowance.
5. Attach trim around the edge of the seat using finishing nails or an upholstery adhesive. This will give your seat a professional-looking finish.
You’ve now successfully built your own custom fly fishing boat seat!
Reupholstering Boat Seats, Cushions, and Covers: A Step-by-Step Guide with Pictures
Reupholstering Boat Seats, Cushions, and Covers: A Step-by-Step Guide with Pictures
Is your boat’s upholstery looking a little worn? Or maybe you’re just ready for a change of style. Either way, reupholstering your boat seats, cushions, and covers is a great way to breathe new life into your vessel. Plus, it’s a relatively easy do-it-yourself project that will save you money in the long run.
To reupholster your boat seats, start by removing the old fabric and batting. Next, measure and cut the new fabric and batting to size. Then, staple the batting to the underside of the seat frame and stretch the fabric over the top of the seat, stapling it in place on the other side. Trim away any excess fabric, leaving a ½” seam allowance. Finally, attach trim around the edge of the seat using finishing nails or an upholstery adhesive.
For detailed instructions with pictures, please see the following article: How to Reupholster Boat Seats, Cushions, and Covers.
Boat Seat Build — “Robalo Boat Project 61” (Robot Boat Project 61)
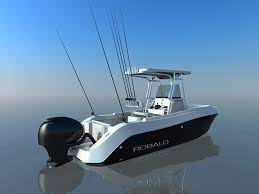
Boat Seat Build — “Robalo Boat Project 61” (Robot Boat Project 61)
This is a boat seat build for the “Robalo Boat Project 61.” The dimensions for this seat are:
Width – 21″
Depth – 18″
Height – 19.5″
Materials needed:
-1/2″ plywood (cabinetry grade or better)
-epoxy resin (for sealing edges of plywood)
-1″ screws (stainless steel or brass)
-upholstery fabric
-upholstery batting
-trim (optional)
-finishing nails or upholstery adhesive (for attaching trim)
Tools needed:
-tape measure
-circular saw or jigsaw
-drill
-staple gun
-scissors or rotary cutter
-hammer
Instructions:
1. Cut the plywood for the seat frame using a circular saw or jigsaw. If you’re using plywood, be sure to seal the edges with epoxy resin to prevent them from Splintering.
2. Drill pilot holes in the seat frame and screw the plywood or particle board to the frame. Be sure to countersink the screws so that they’re flush with the surface of the wood.
3. Upholster the seat with fabric and batting. Begin by stapling a piece of batting to the underside of the seat frame. Then, stretch the fabric over the top of the seat and staple it in place on the other side. Trim away any excess fabric, leaving a ½” seam allowance.
4. Attach trim around the edge of the seat using finishing nails or an upholstery adhesive. This will give your seat a professional-looking finish.
You’ve now successfully built your own custom boat seat!
Conclusion
Building a boat seat box is a great weekend project that can be completed with basic carpentry skills. The finished product will add extra seating and storage to your boat, and it’s a relatively easy project to complete.
Follow the steps in this article, and you’ll have a new boat seat box in no time!
This ddiscoverthedinosaurs.com post will show the information about “how to build a boat seat box”
- aluminum boat seat box base
- how to build a boat bench seat
- boat seat storage box
- aluminum boat seat boxes for sale
- how to build boat seat frames
- boat seat plans
- diy boat bench seat with storage


