Did you know that you can run a boat on muffs? You don’t need to use fuel or gasoline, and it’s a great way to save money. In this blog post, we’re going to teach you how to do it. Stay tuned!
With 5 minutes, Todd Vogel will answer you the question “How long can you run a boat on muffs? Accidentally started outboard out of waterHow long can you run a boat on muffs? Accidentally started outboard out of water” and more relevant information. Let’s find out together!
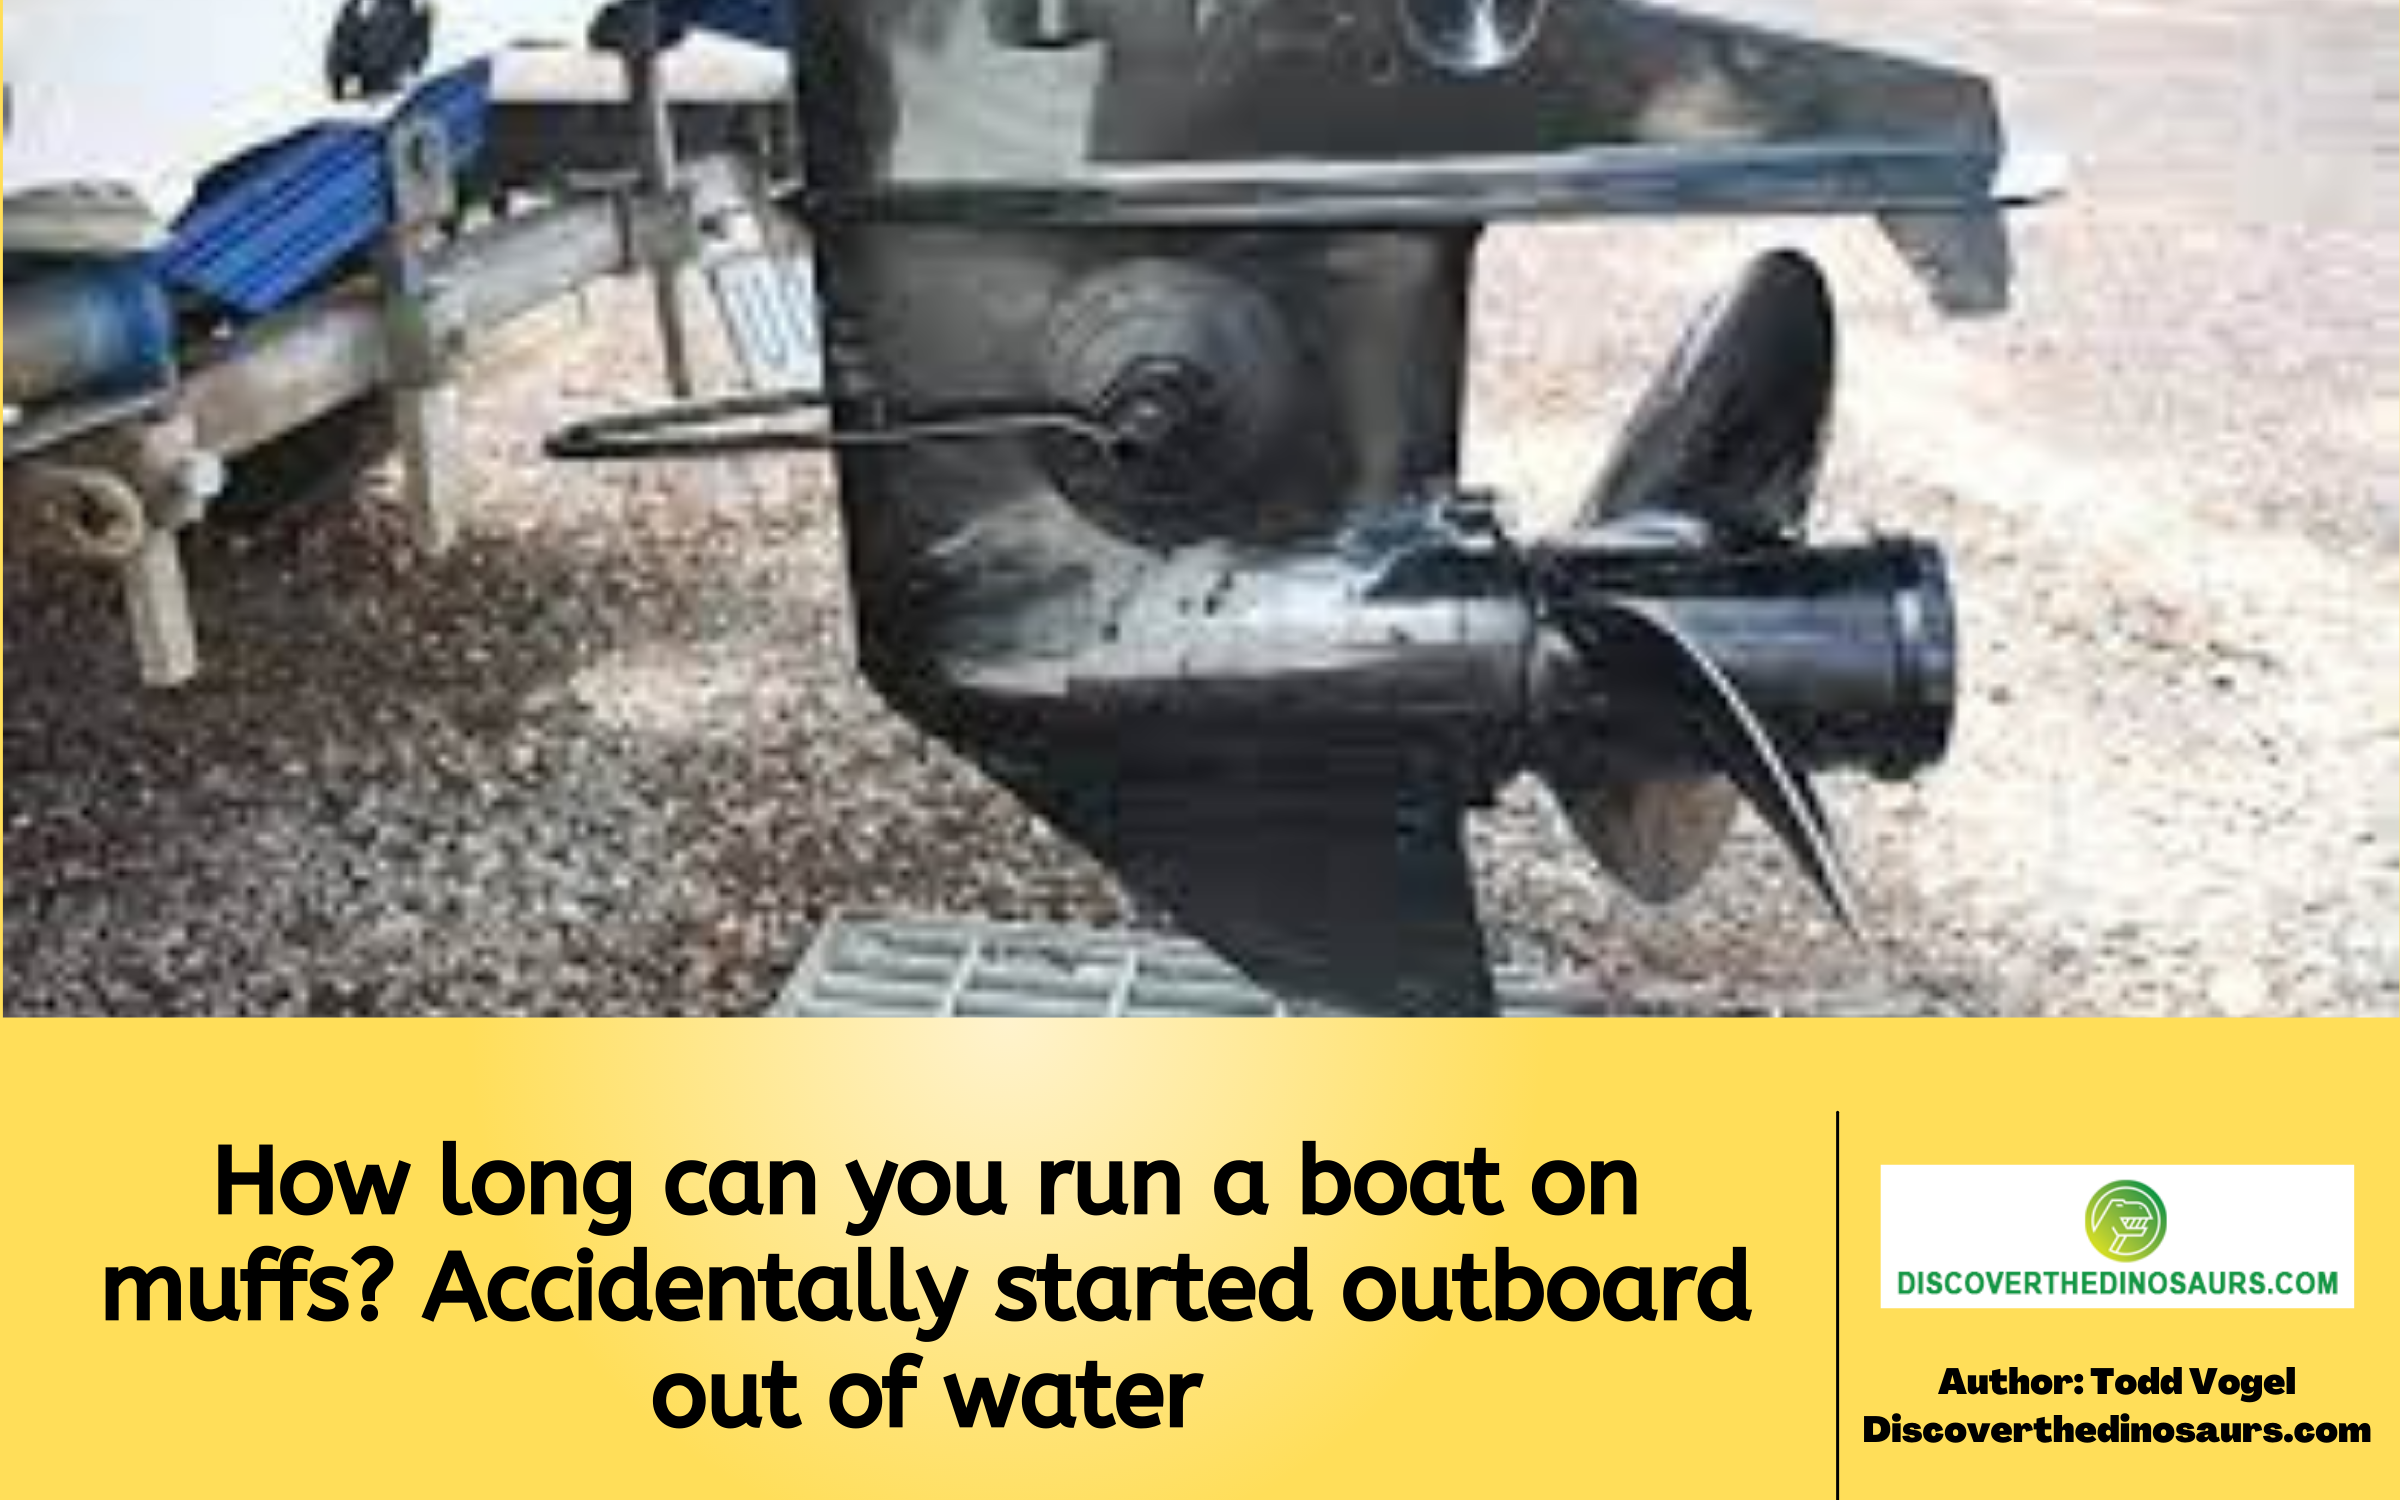
How long can you run a boat on muffs? Accidentally started outboard out of water
How long can I sail with muffs?
How long can I sail with muffs?
You can sail with muffs as long as you need to in order to keep the engine cool. However, you should not exceed the recommended time limit for flushing the engine, which is typically three to five minutes. If you do exceed this time limit, you may overheat the engine and cause damage.
The Correct Method of Outboard Flushing
The Correct Method of Outboard Flushing
It appears to be straightforward, but hold on! This crucial task can be done correctly or incorrectly.
Doing it wrong can lead to engine problems and an expensive fix.
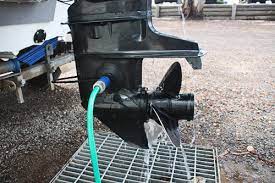
The first step is to identify the correct type of outboard flushing device for your motor. There are three types of devices:
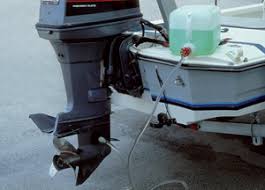
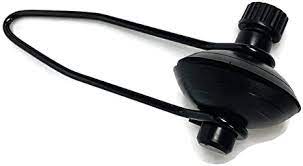
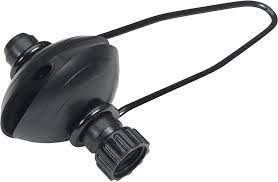
- ear muffs,
- a flushing attachment that screws onto the lower unit water intake, or
- a portable flushing system that hooks up to the boat’s water supply.
- If you have a four-stroke outboard, you will also need to purchase oil and a filter.
You should also consult your owner’s manual for specific instructions on how to flush your outboard motor.
The Traditional Approach
- Step 1: Remove the boat from the water.
This will allow you to work on the motor without getting wet and also prevent any water from entering the engine through the lower unit since it will be above the waterline.
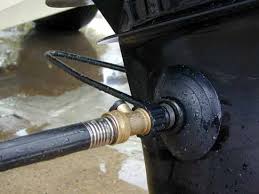
- Step 2: Attach the outboard flushing device.
If you are using ear muffs, simply place them over the water intakes on the lower unit. If you have a flushing attachment that screws onto the lower unit, do so now. If you are using a portable flushing system, connect one end to the boat’s water supply and the other to the inlet on the lower unit.
- Step 3: Start the engine and let it run for a few minutes.
This will allow the engine to reach operating temperature, which is important for flushing the system properly.
- Step 4: Shut off the engine and disconnect the outboard flushing device.
If you are using ear muffs, simply remove them from the lower unit. If you have a flushing attachment that screws onto the lower unit, unscrew it now. If you are using a portable flushing system, disconnect it from the boat’s water supply and the lower unit.
- Step 5: Refill the engine with fresh oil and install a new filter (if applicable).
This is an important step in the process because used oil can break down and form sludge, which can clog the engine and lead to problems.
- Step 6: Start the engine and let it run for a few minutes.
This will allow the oil to circulate through the system and reach all of the moving parts.
- Step 7: Shut off the engine and disconnect the outboard flushing device.
If you are using ear muffs, simply remove them from the lower unit. If you have a flushing attachment that screws onto the lower unit, unscrew it now. If you are using a portable flusing system, disconnect it from the boat’s water supply and the lower unit.
- Step 8: Refill the engine with fresh gear oil (if applicable).
This is an important step in the process because used gear oil can break down and form sludge, which can clog the engine and lead to problems.
- Step 9: Start the engine and let it run for a few minutes.
This will allow the oil to circulate through the system and reach all of the moving parts.
- Step 10: Shut off the engine and disconnect the outboard flushing device.
If you are using ear muffs, simply remove them from the lower unit. If you have a flushing attachment that screws onto the lower unit, unscrew it now. If you are using a portable flusing system, disconnect it from the boat’s water supply and the lower unit.
And there you have it! You have successfully flushed your outboard motor.
Flushing Attachments Included
There are many advantages to using a flushing attachment when flushing your outboard motor. First, it helps to prevent water from entering the engine through the lower unit, which can lead to problems. Second, it allows you to flush the entire system, including the oil and gear oil (if applicable). And third, it makes the process much easier and less messy.
If you don’t have a flushing attachment, don’t worry – they are relatively inexpensive and can be found at most marine supply stores. In fact, many outboard manufacturers now include a flushing attachment with their motors. So be sure to check yours to see if one is included.
The bottom line is that using a flushing attachment is the best way to flush your outboard motor. So if you don’t have one, be sure to get one – it will make the process much easier and less messy.
Bags for Flushing
As you know, there are many advantages to using a flushing attachment when flushing your outboard motor. But what if you don’t have one? No problem – you can still flush your outboard motor the right way with the help of some simple bags.
Here’s what you need to do:
Step 1: Fill two large garbage bags with clean water.
You will need enough water to cover the lower unit of your outboard motor.
Step 2: Place one bag over the water intakes on the lower unit.
If you have a flushing attachment that screws onto the lower unit, do so now. If you are using a portable flushing system, connect one end of the hose to the water supply and the other end to the lower unit.
Step 3: Place the second bag over the exhaust outlet on the lower unit.
This will prevent water from entering the engine through the exhaust.
Step 4: Start the engine and let it run for a few minutes.
This will allow the water to circulate through the system and reach all of the moving parts.
Step 5: Shut off the engine and remove the bags.
If you are using ear muffs, simply remove them from the lower unit. If you have a flushing attachment that screws onto the lower unit, unscrew it now. If you are using a portable flusing system, disconnect it from the boat’s water supply and the lower unit.
Step 6: Refill the engine with fresh gear oil (if applicable).
This is an important step in the process because used gear oil can break down and form sludge, which can clog the engine and lead to problems.
Step 7: Start the engine and let it run for a few minutes.
This will allow the oil to circulate through the system and reach all of the moving parts.
Step 8: Shut off the engine and disconnect the outboard flushing device.
If you are using ear muffs, simply remove them from the lower unit. If you have a flushing attachment that screws onto the lower unit, unscrew it now. If you are using a portable flusing system, disconnect it from the boat’s water supply and the lower unit.
And there you have it! You have successfully flushed your outboard motor.
Manufacturers’ Suggestions
The flushing guidelines of most outboard manufacturers are comparable. They all make a point of ensuring that all water is drained from the engine after flushing. This is especially crucial in cold climates to ensure that no water remains inside the engine and freezes, causing damage. The variations between each manufacturer are listed below.
Evinrude is a boat manufacturer (BRP)
On their 15- to 30-hp models and high-performance Lightning M2-type gear cases, temporarily seal the auxiliary water inlets with strong tape for flush-muff attachments (remember to remove the tape afterward).
The water pressure should be between 20 and 40 pounds per square inch. (A pressure gauge attachment can be purchased at a hardware store to measure psi.) Flush the engine vertically for at least five minutes at an idle speed. It is not essential to start the engine when using the flushing port. After flushing, keep the engine vertical to ensure that all water drains from the powerhead.
Honda
The cleansing technique used by Honda varies by engine size and model. During cleansing and draining the water from the engine, the engine must always be in the upright position. Flushing in a tiny container (such as a flushing bag, small bucket, or can) is appropriate for smaller engines (2 to 20 hp).
An optional flushing adapter (Honda part #06190-ZV1-860) is available for engines 5 hp and more that allows the engine to be flushed through a port on the side of the gear case. With either process, the prop must be removed and the engine ran for around five minutes. Both approaches are acceptable.
Use just the factory “WASH” port in the lower port/left side of the gear case on midsize engines (25 to 50 horsepower). The engine must operate for around five minutes without the prop. If water pressure is low, Honda recommends using tape to seal the engine’s water intakes on both sides of the gear case.
Honda’s only recommended flushing approach for larger engines (60 to 250 hp) is to use the original flushing port attached to a garden hose when the engine is turned off.
Mercury
Mercury’s process differs depending on the engine size and series. The flush port at the back of the engine is used by smaller and medium four-stroke outboards. To open the thermostat and circulate water throughout the engine’s cooling tubes completely, the engine must be warmed up.
The engine can be positioned horizontally or vertically. Remove the prop and run in neutral for at least five minutes at no more than idle speed. To maintain water pressure, the water supply should only be opened halfway.
Remove the prop, attach flush muffs so that the rubber cups fit securely over the water intakes, and regulate water flow so that some water leaks out around the cups on Optimax two-stroke outboards.
Start the engine and let it idle for three to five minutes in neutral. Mercury supplies a garden-hose adapter that connects to a port in the lower engine cowl that may be accessible by removing a dust cover for flushing without muffs. Mercury recommends detaching the water supply hose from the adapter and tilting the engine to allow all of the cooling water to drain out.
This is particularly significant in cold climates. The water pressure should be no more than 45 psi. When flushing, the engine might be running or not, and it should be flushed for at least three minutes.
This technique should be followed when cleansing the engine after use in salty or unclean water, as well as while preparing the outboard for storage, according to Mercury.
In the manual for Verado four-stroke outboards, there is no mention of employing flush muffs; just the engine’s hose-adapter fitting is shown.
The technique is brief, stating merely that the engine should be turned off and that it can be inclined or vertical.
Suzuki
Flushing via a flush-muff attachment or built-in port is the preferable option. When using flush muffs, only run the engine at idle in neutral for a few minutes, watching for correct water flow out of the tell-tale outlet.
One flushing port is located on the port side of the engine midsection, while the other is located on the front side of the lower cowl. The engine might be running or not; flush for five minutes and make sure the engine is totally drained.
The engine can be flushed in the tilted position while not operating, but it must be returned to the upright position to drain.
Tohatsu/Nissan
Use the optional flushing plug or a small container such as a garbage can or tub filled with fresh water for smaller engines (2 to 6 horsepower). Use the flush port or a set of flushing muffs on larger engines.
To ensure appropriate flow to the intakes, set the water pressure to half or more. Allow five to ten minutes for the engine to run.
Yamaha
Yamaha offers three options: flush bag, muffs, or hose-port connector, and claims that all three techniques are equally effective. Muffs and Bag: With the prop removed, the engine should be vertical and run at no more than 800-900 rpm in neutral for 15 minutes.
Make sure the engine is getting enough water to cool down (by checking the overboard indicator). A flush bag should be utilized if your outboard has more than one set of cooling inlets.
Engine should not be running when flushing; it might be inclined or vertical. The prop should be taken away. For 10-15 minutes, flush.
F.A.Q about “how long can you run a boat on muffs”
What is the purpose of boat muffs?
What is the purpose of boat muffs?
Boat muffs are used to flush the engine with clean water, which helps to prevent salt and other debris from building up and causing corrosion. Muffs also help to cool the engine after it has been used, which can prolong its life.
What exactly are boat muffs?
What exactly are boat muffs?
Boat muffs are devices that attach to the boat’s engine and pump water through it in order to flush out salt, sand, and other debris. Muffs also help to cool the engine after it has been used, which can prolong its life.
Should I keep my outboard motor turned on or off?
It is typically best to keep your outboard motor turned off when you are not using it, as this will help to prolong the life of the engine. However, if you need to flush the engine with boat muffs, you will need to turn it on in order to pump water through it.
Can you get a boat out of the water by cranking it?
Can you get a boat out of the water by cranking it?
No, you cannot get a boat out of the water by cranking it. Boat muffs must be used in order to flush the engine with clean water.
Is it possible to start an outboard engine without being in the water?
It is possible to start an outboard engine without being in the water, but it is not recommended. If you do start the engine out of the water, you will need to use boat muffs to flush the engine with clean water. Otherwise, salt and other debris can build up and cause corrosion.
Is it possible to test a boat motor outside of the water?
Is it possible to test a boat motor outside of the water?
No, it is not possible to test a boat motor outside of the water. Boat muffs must be used in order to flush the engine with clean water. Otherwise, salt and other debris can build up and cause corrosion.
How long can an impeller be completely dry?
If an impeller is completely dry, it can begin to deteriorate and break down. For this reason, it is important to always keep the engine flushed with clean water, even when it is not in use. Boat muffs can be used to flush the engine and keep the impeller wet.
Is it dangerous to start a boat motor on land?
Is it dangerous to start a boat motor on land?
Yes, it is dangerous to start a boat motor on land. Boat muffs must be used in order to flush the engine with clean water. Otherwise, salt and other debris can build up and cause corrosion. Additionally, the engine could overheat and catch fire if it is not properly cooled.
Is it legal to operate a boat while wearing muffs?
At idle speeds, running the drive out of the water on muffs will not hurt it. There will be no resistance and it will travel extremely quickly if you put it in gear with the prop out of the water.
How long can a boat motor be run on a hose?
……and it can be used every day. (Without coolant, the neoprene impeller in the waterpump will be damaged after about 30 seconds.) If you take that out of the equation, the engine will last 3-5 minutes.) If you run an inboard out of the water, pay close attention to the prop underneath the boat.
How long can a Mercruiser be driven on muffs?
If you absolutely must, you can operate your boat motor for between 2 and 10 seconds without water.
How long can an impeller be completely dry?
approximately 15 minutes
The World’s Only Impellers Guaranteed to Run-Dry® for Up to 15 Minutes! Trust the most trustworthy components available since your time on the water is valuable. Globe’s Run-Dry® impellers surpass ordinary neoprene or rubber impellers in tests, and they’re guaranteed to dry in 15 minutes.
How long can you keep a boat afloat?
If you absolutely must, you can operate your boat motor for between 2 and 10 seconds without water.
Conclusion
While there are many factors to consider when it comes time to service or repair your boat’s engine, knowing the basics can help you troubleshoot some common issues. By understanding how long you can run your boat on muffs and what may happen if you don’t change them out regularly, you can be better prepared for upcoming repairs and avoid costly damage down the road.
This post discoverthedinosaurs.com will show the information about “How long can you run a boat on muffs? Accidentally started outboard out of water”


